Wednesday 28 December 2011

Sad News

My Mother died in May and so have been back in the UK taking care of affairs.

My job has also moved back to the UK so I am no longer able to work on SprayMaker . The plan is to keep the house until we can return and then resume the project.

In the shorter term I have purchased a 21ft Junk rigged Coromandell in the UK which I am going to convert for single handed sailing and use for some personal voyages of adventure. The first of these is planned for June 2012 where I am planning a 600 mile trip into the bay of Biscay. I will be starting a new blog to cover the conversion and the trip. Will put the link here when available.

Sunday 14 November 2010

From Portholes to Hatches

Having cut the portholes and welded in the mountings now I have to tackle the escape hatches. I have decided to have one in each cabin so need three in all, the first will be in the forward cabin above the berths, the second in the main cabin over the table (so that it can be used to stand on to exit) and the third in the aft cabin. I have purchase 3 Lewmar ocean series 44" hatches but to get them to fit in the boat I need to make mountings that will negate the curve of the deck and provide a flange inside the boat that matches the depth of the stringers. Here is how I went about the process:


The 1st job is to cut four 120mm long flat 25mm bar sections to make the corners of the support frame for the Lewmar hatches


Next I mark out and cut three v's in the flat bar
 

The flat bar can then be bent to 90deg to make the corners


The corners are clamped down on to the jig, more flat bar measured and cut to fill the gaps then tack welded into place


Four more pieces of 50mm bar are cut and welded on top of the flat bar frame


Finally its all welded, any gaps filled in and smoothed down with an angle grinder
 

Now all that has to be done is to cut the holes in the deck to allow the bottom oth the frame to pass through, weld in position, drill matching holes for the hatch and mount in place. Thats the second one made so just one more to go. When I have this job done then next its the construction of the guardrails, pushpit and pulpit.

Tuesday 19 October 2010

Portholes!

This week Simon and me managed to cut the front portholes! We have welded in the steel inserts ready for mounting the bronze fittings but I think it will be a while before we are ready for the finishing touches, here are some videos of the cutting operation.
I am using a plasma cutter which is a great tool, it takes quite a bit of setting up though, in the next video you can see how well it cuts the 8mm marine grade steel
OK once the high tec stuff is finished we apply the art of gentle persuasion, WITH A BIG HAMMER
Tomorow we will be working on the aft cabin portholes and the escape hatches.

Sunday 17 October 2010

Sailing Break in Norfolk


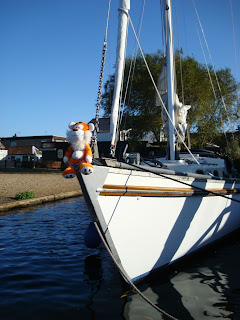
Typhoon with mascot Tigger
 
Every year in October I stop work, down tools and travel to Norfolk for the annual Barton sailing Regatta. It is a unique sailing holiday where a few brave hire companies hire their yachts to a group of mad would be olympic sailers! I have been going since 1992 and just love both the racing and the singing in the bars afterwards.

The picture on the left shows our main racing tool TIGGER who frightens the opposition and keeps the wind in our sails!
Typhoon under sail

 This year we hired Typhoon which is a change for me as I usually go for gaff rigged boats but I fancied a change(and a bit more comfort) and so went for this boat with full standing headroom (in 6ft 4in!) 
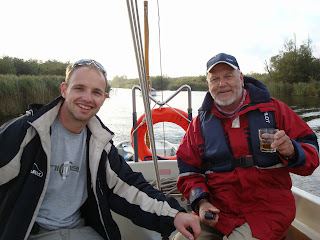
My crew Simon left Dave right 

My Son Simon has sailed with me for many years and along with my building buddy on Spraymaker Dave, we made a good team


The competition is good!
 Here we are aproaching a windward mark, this is our first year in the B fleet as I have always sailed in the A with the gaffers but the sailers of these bermudan rigged boats are as keen as mustard!


A wet Father and Son moment
 We only had one rainy day all week but it didn't dampen our spirits, as I live in Spain and Simon is in the UK its a great chance for us to spend time together doing something we both love
Lots of handbagage for Ryanair
 This year luck was on our side and we took the silverware. It was a great team effort and I am proud to say that my son is hiring his own boat next year and sailing against me!
Tiger watches the end to a perfect sailing holiday
Tigger says goodbye to The Norfolk Broads for another year, he will be back!

For now its back to building SPRAYMAKER

Sunday 3 October 2010

A Slow Hot Summer

With temperatures well into the high 30s work has been confined to Saturday and Sunday Mornings, I also had to do some work around the house but the last month has seen some good steps forward, The welding of the hull is now complete and all the welds have been tested (we used paraffin to check the welds as it will find the smallest crack or hole and use capillary action to find its way through, Any where we found signs of the  paraffin outside we ground out and re-welded, the worst places were near the keel where it was impossible to weld inside the boat. So the Hull is now ready for the next stage and we are still hoping to keep to the original schedule mentioned in the last blog of November.

Access to engine room and rear cabin
 As you can see from the pictures the engine room hatch has been constructed and we have cut the hatches for the walkthru from the front to rear Cabin.
The last couple of weeks have been testing for my credit card as I purchased 30ltrs of primer (Hempadure 2 pot) along with filler and thinners, I also took delivery of a small sandblaster, and a 10bar compressor to prepare the hull prior to priming.


The proud owner of 12 Bronze weld in portholes
The best purchase has to be these wonderfull Bronze portholes from Trinity Marine, I cant wait to weld them in place. On the floor behind me you can see the rudder which is now under construction, I am just waiting for the stainless steel stock and will be making most of the other fittings.


I have a weeks holiday on the Norfolk Broads coming up and then a full week working on the boat, my Son will be over helping as well so I am hoping to make good progress by the end of October and will try and update the blog then. Bye for now

Tuesday 6 April 2010

End of the 1st Phase

At last the welding of the hull is complete bar a few tidy up jobs! in the engine room and on the bow, just a couple of days work at most. As  I am not a coded welder I have gone for a belt and braces approach and double welded the complete hull inside and out. I used a mig welder inside and an invertor externaly to mitigate wind problems. The welding started at the center keel of the boat and worked forward aft and up in a spiders web approach. As far as I can tell the hull is fair and the measurments taken confirm no distortion.

In the next six months I my plan is to:
  • Cut all portholes and deck hatch openings
  • Fit all welded deck gear
  • Fit main hatches
  • Assemble and fit rudder
  • Fit posts for for the Bulwark with SS caps
  • Fit rubbing strafe
  • Shot blast and prime interior and exterior
  • insulate interior
  • Source 52hp inboard (thinking of Vetus)
I dont think I will have too many free weekends with a heavy work load but will blog again as soon as i can with further updates.

Sunday 31 January 2010

The Welding Continues!!

I don't have a picture of progress as for the last few months visually nothing has changed! However every weekend is a ritual of hauling out the grinders and the welder and inch by inch weld the hull together. I finished the inside just after Christmas which was a pig of a job especially right up in the bow. The weather has been really bad for ages now but this weekend it finally stopped raining and I could get a good run at the seam welding outside. I used a mig inside but invested in an inverter stick welder which is a great tool and not worried by the wind which kills the mig. Welding outside is a joy compared to in and I estimate I will complete the process in around ten working days (about 5 weekends worth) Then its down all the welded fittings before shot blasting and priming. THEN I WILL HAVE SOME PICTURES